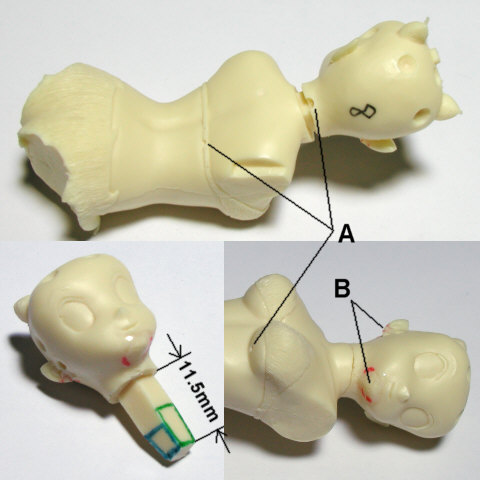
 Check the state of parts
 - "A" are holes by air bubbles. Before filling putty, extend the surface and enlarge the holes. Since "B" (reddish portion) are the portions I filled up with resin afterwards for put out the molding deficits, they needs restoration. By this part (the 8th shot), the jaw was completely missing with air bubbles. - A gap exists on the neck like the upper photograph only by cutting off simply the remains of the neck shaft gate. Shorten the length of the shaft part in 11.5mm or less, and shave the taper sides which enclosed at blue and green crossroads about 0.3mm. - After the modification, the head fits in exactly like the lower photograph. Shave the tight field of the shaft when assembling the head, and adjusts the inset force which need a little power for inserting the head. |
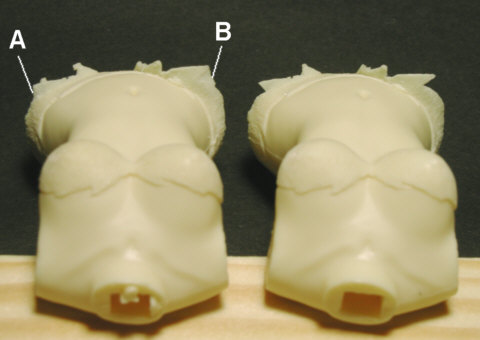
 Form the edges of a bikini
 - Cut off "A" and "B" portions with an pen knife etc., and made the form to the right photograph. Cut off the unnecessary burr also. - After the processing, please treat carefully since the edges becomes easy to break. |
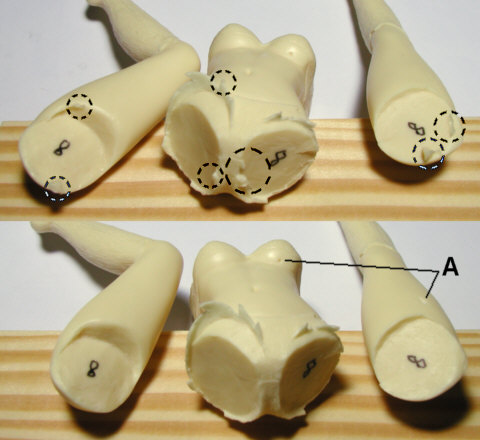
 Processing of the remains of burr and gates
 - Cut off all portions marked circles, and finish the state of under photograph. Be careful not to cut off the protrusion of the bikini by mistake. - All of bubble holes "A" that noticed should be extend. |
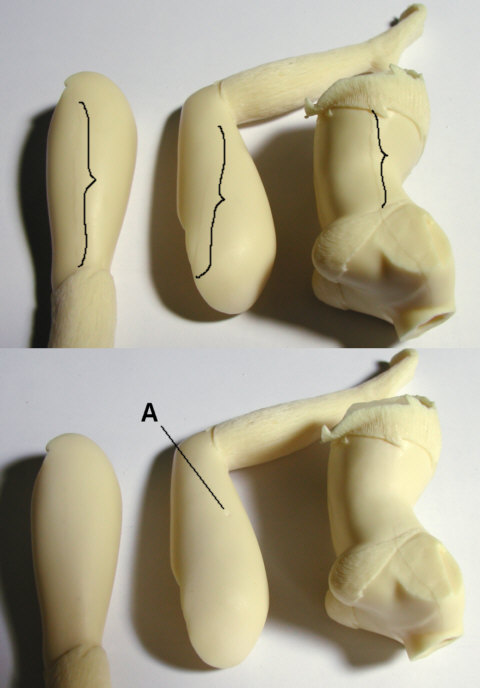
 Processing of the parting line
 - The parting lines (division side of silicone model) exist along with the black middle parenthesis. - Finish the parting lines using in order of file, field shaving knife, and Sutairo- Sand. Even if leave the parting line of the adhesion side, no problem.  Photograph after processing the parting line
 - Here is a bubble hole "A". Since all of bubbles ware not necessarily made in the same place, please look for them well. |
 Correction of the hair
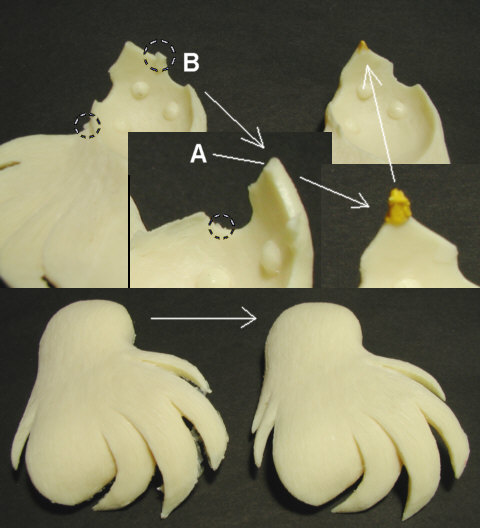
 - Since the front end of back hair is lost with air bubbles, correct with poly putty. - Cut off "B" (the remains of the gate) , and cut in "A " (bubble portion) inside aslant, and secure the area putty mounts. pile the putty for longer and it wait for hardening. When restoration, on the state of attaching forelock on the head, shave it little by little with confirming the combination state.  Finishing of the burr
 - Since the edge of hair is full of burr, on the narrow crevice cut off it using pen knife. Finished the edge end of hair so that it may sharpen if possible. |
 Temporary assembling the hair
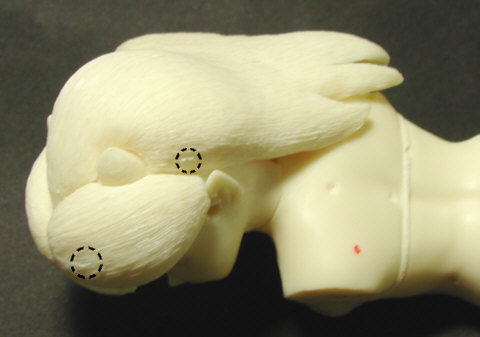
 - If it is finished well, the hair suits exactly so that the horns may be packed. The portion marked circles are the protrusion made by the crack of the silicone model parting line. Finish them cutting off also. The shaved portion on the hair which the hair line molding missed can be change into hair line taste, by cutting with pen knife whitch moving along with the line and tilting down on right and left. |
 Processing of bubbles
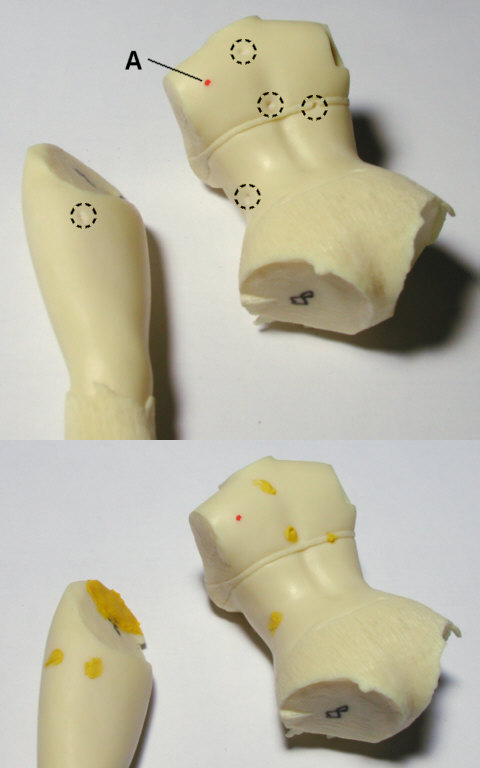
 - Pile poly putty on the opened bubbles to put out the holes. The lower photograph is the state of the after Piling putty. - Since "A" the red portion has a slight convex, delete here using Sutairo-Sand etc.  The putty piling on the bubbles
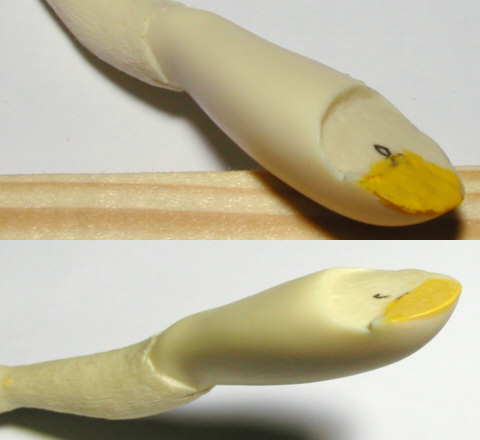
 - Pile up poly putty quickly on the bubble holes. - Although the left thigh (the straighter one) is visible on the left side, when I changed slight the leg angle of prototype, fitting of the adhesion surface had became bad. Pile up putty on the upper portion of the adhesion surface with the thickness of about 0.5mm. Pile up a lot so that a few putty goes beyond on the appearance portion. |
 Finishing of the adhesion surface of left thigh
 - Shave the putty surface with the carving knife little by little, checking the fitting with body. The thickness in which putty remains is about 0.3mm at the edge. Lower photograph is the state after finished. |
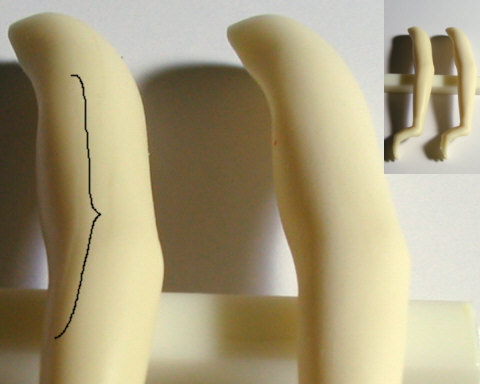
 Processing of the parting line of arms
 - Left of the photograph is the state of before finishing the parting line, and the right is after finished. |
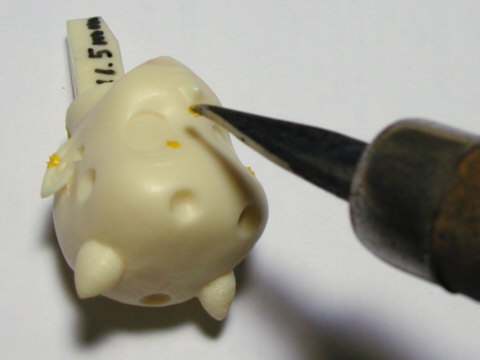
 Processing of the bubbles on the face
 - Air bubbles exist on the groove of eyelid, the outline of ear, and around jaw. Since the facial form is sensitive, extend the bubbles holes with reserve and pile putty to a minimum. |
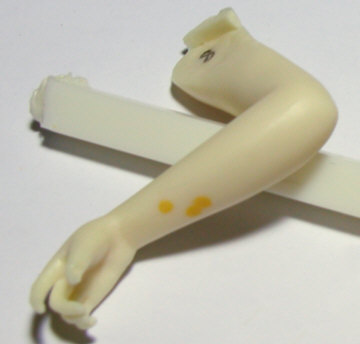
 Finishing of the putty pile portion of bubbles
 - Shave the putty by file to an about 0.1mm height from the surface, and grinding with water by Sutairo-Sand the rest. The photograph is the state after finish of right arm. |
 Finished state of each parts
 - The top is in the state after the putty peak, the bottom is after finishing up. - Next, it progresses to the painting process finally. 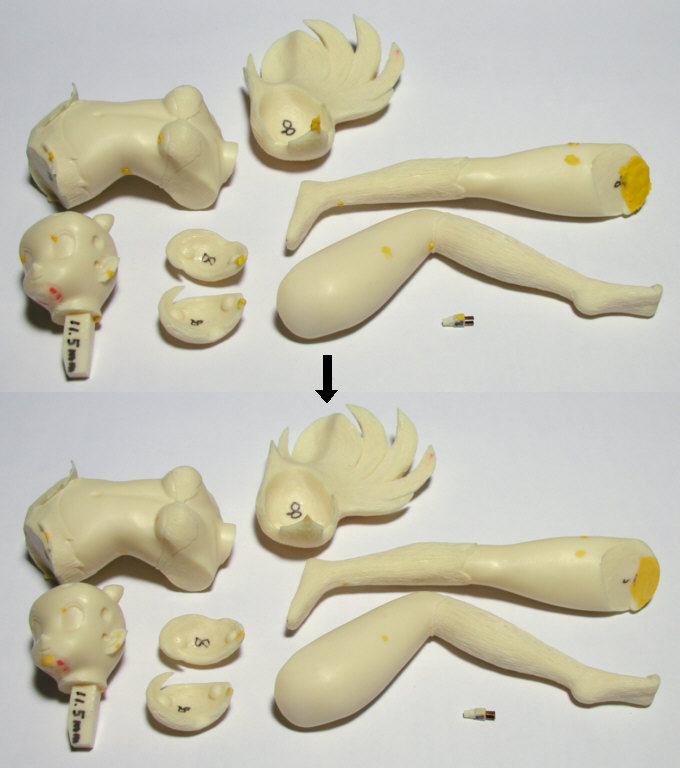
|
|
|
Back to The before process
Return to the Figures Making Data Mansion