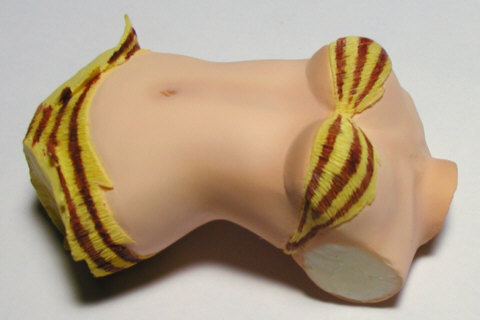
 Paint of the tiger striped pattern of the bikini
 - Although I used red-brown (#41) for the tiger striped pattern, you may use black or dark-green freely. Since the bikini has processed hair line perpendicularly, if use the paint which thinned too much, it will flow perpendicularly and spread, else if too thick, paint will stay only on the surface. Although it will be the severe work, let's do your best soaking the top of the brush in the bottle of the paint thinner. - The portion which skin color protruded into the bikini also correct by brush coating without neglect. |
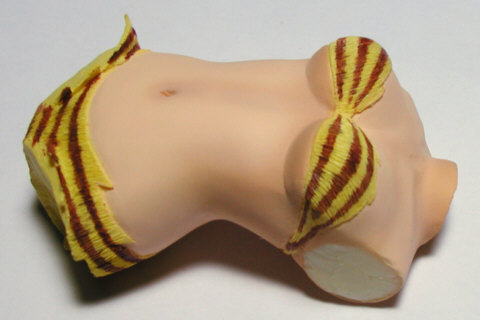
 Paint of the tiger striped pattern of socks
 - Paint the tiger stripes as same as bikini. Since socks are conspicuous when the painting failed, you shoud better do it after practicing with bikini previously. - The number of striped (from under a knee to the heel) is the best about ten. It will be sure after deciding a pitch previously. |
 Drawing of the face
 1: Paint the white of the eyes. - Paint white so that it may pile up fully, and it is applied twice. Before drawing the pupils, dry up sufficiently. - The ditch on the ears may be paint with brownish color. 2: Put the base color of pupils. - Attach the right pupil inside, and the left pupil had better keep distance about 0.5mm with edge of eye so that make eyes direction stable. The left pupil may becomes large due to the wide space, you can keep balance if you make the right pupil greatly going beyond to the up side. (Although the photograph has not become so ..(^^;) Since her left side view is the original angle, it is no problem that the left pupil is large (like an excuse..). - Since the color of the pupils offen painted greenish, I painted it them safely with green and blue mixture. 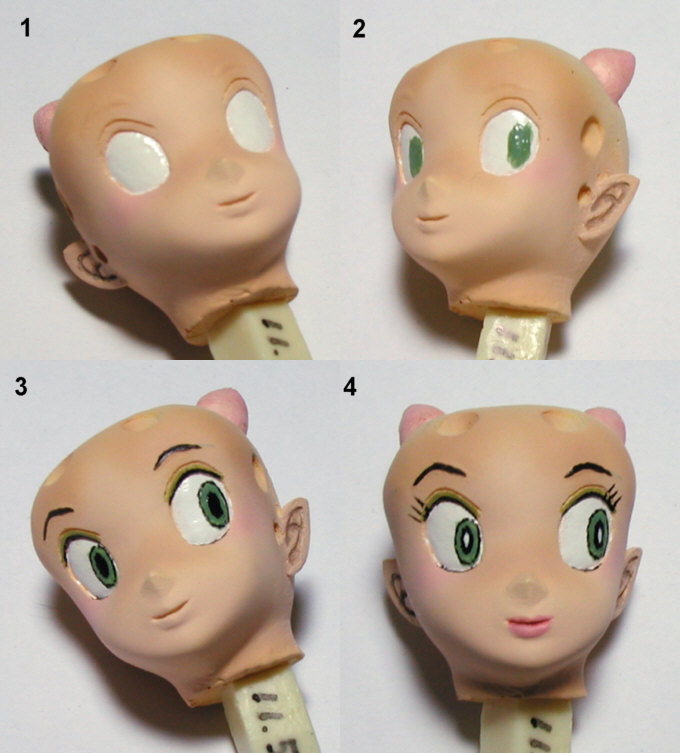 3: Paint the outline of the eyes and the iris. - Paint the color of eyelids previously. I used green somewhat brighter than pupils. - Outline writing of pupils is the most tense work. Although it may seems an easy work with the photograph, the size of real thing is 1/5 or less, you should adjust the head of brush most carefully. In this size, it never become a beautiful ellipse. If the paint have gone beyond, you can shave the paint with the tip of knife. - When painting the eyeliner, take care not to overlap the color of eyelids. The bottom of eyeliner should be made into the minimum so that it may not become thick. - Since eyebrows are hidden by forelock about half, you should not necessary arrange the thickness perfectly. 4: Paint the pupil's highlight and eyelashes. - Although I painted the highlight of pupils by once, since the width is about 0.3mm, it is difficult to arrange very much. It may be safety that shift it from the center of the pupil and make it somewhat larger. - The painting of eyelashes is also only one match. Thinness of eyelashes are not to say, it is fairly difficult to arrange 3 pitches with good balance, so draw them with concentration. - For the painting of lip redness, after painting with deep redness on between lips previously, paint on the upper and lower lip with weaker redness color. - This would be the completion of the drawing of face, but after this, I painted shadow color on the bottom of nose, and served Super-Gloss (#155) on the eyes to raise the gloss. When you apply Super-Gloss, you should apply it surely from the white-of-the-eye portion. If you apply from the pupil side, you may be failed that the pupil's color runs to the white-of-the-eye portion. |
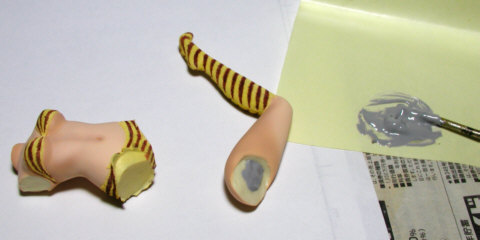
 Junction of both legs
 - Join both legs and body using epoxy glue (5-minute type). The quantity of glue applies somewhat much in order to maintain strength even if it going beyond. Pile the glue fewer at once and combine and remove the adhesion side, and add the glue if the spread condition of glue is insufficient. When hardening has started before adhesion, sufficient adhesion strength can not keep, so remove the glue while it is soft, and try again. |
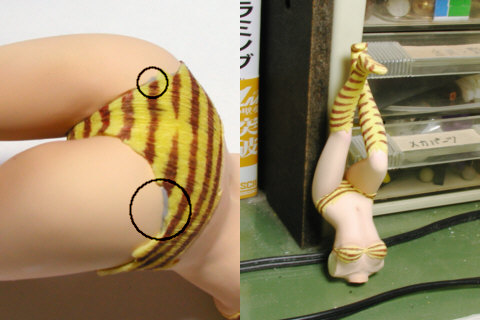
 The state after junction of both legs
 - In the left photograph, though glue have overflowed partially, leaves it as it is until it solidifies without touching. If wipe off glue before hardening, it spreads and the paint surface is soiled. - As the right photograph, leave the assembly in this state until glue become hard. |
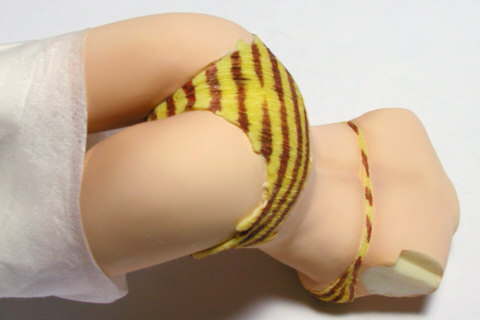
 Processing of both leg's junction portion
 - Cut off the overflowed glue and retouch by brush coating. When using the paint for spray by brush coating, since the paint has gloss much rather than spray paint, mix it a lot lusterless-base (#30). I always mix them on the inner side of the lid of the paint bottle. - Since the lower half of the body has completed at this time, I wrapped with tissue paper for prevent dirt. |
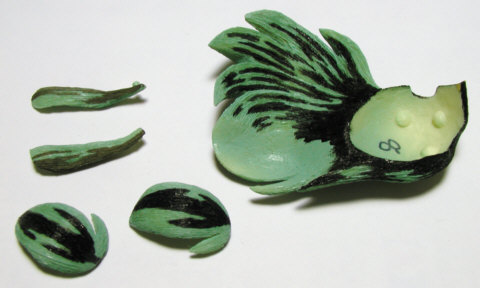
 Painting of the pattern of the hair
 - I draw the pattern with mainly black and partially dark green. (It is conformed with the cover illustration of comics #29) |
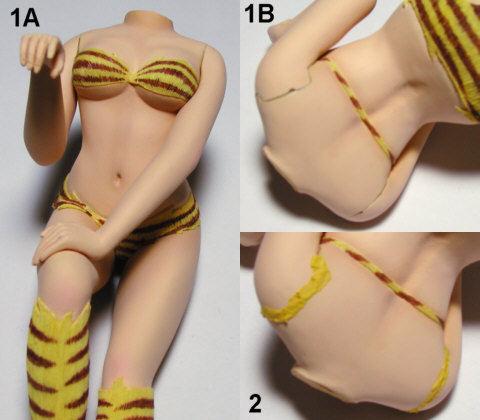
 Junction of both arms
 1A/1B: Join both arms with epoxy glue. Fit the left arm where the hand is exactly attached on right knee. 2: Fill up the junction side with poly putty. If there are projection of glue, remove it previously. |
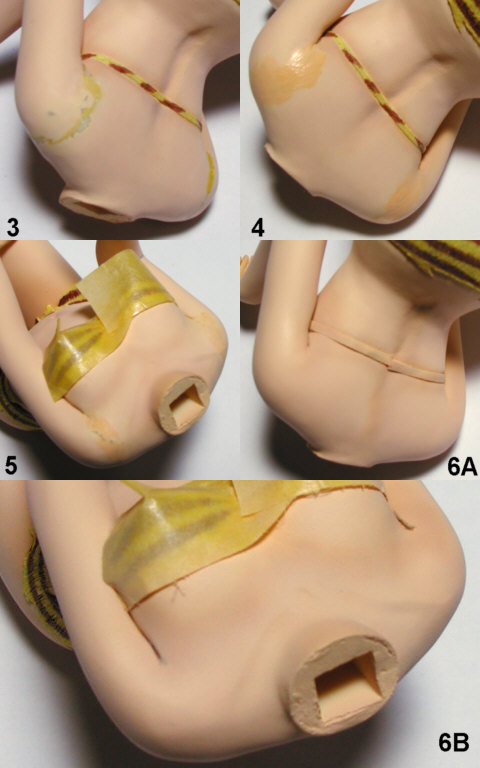
 Processing of the junction side of the shoulder
 3: Shave the poly putty on the junction side and arrange the field. 4: Paint thickly the skin color for base coating by the brush focusing on the portion the base of material appears. 5: Finish the surface of the thick coating portion with paying attention so that not to appear the base. After this, since the spray painting of the skin color for finish is waiting, mask the bikini portion simply. 6A/6B: This is the state which blew the skin color for finish. The portion under the armpits, I made shadow with the brownish color and blew the flesh color for shadows. Finishing of shoulder junction has completed now. |
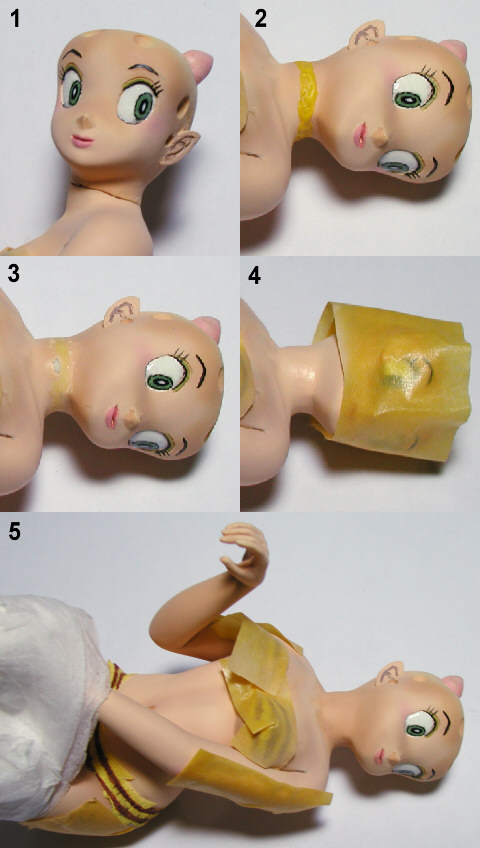
 Junction of the head
 1: This is the state which inserted the head in the body. If it fits in exactly, glue is unnecessary necessarily. 2: This is the state which piled poly putty on the junction side of the neck. 3: Shave the poly putty piled on the junction side, and arrange the face. Finish it full using steel-file, field shaving knife, and rolled finishing-paper etc.., work carefully enough not to make scratch on the bottom of jaw or other. 4: Paint thickly the skin color for base coating mainly on the material exposure face. Though the masking of around the face is for the spray painting of finish, it is useful for prevent scratch under working. 5: This is the state which the junction side of neck had finished. I blew shadow color on the area from under the jaw to the throat. - The masking tapes on the upper arms are for dirt prevention. |
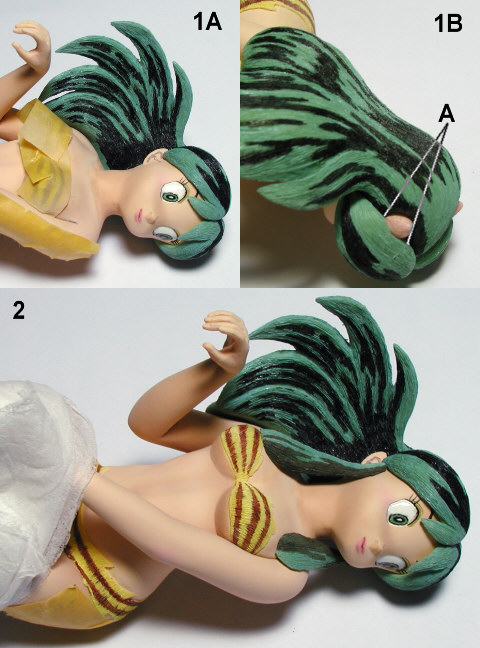
 Junction of the hair
 1A/1B: Glue the forelock (two right and left) and back hair (main) with epoxy glue. Since junction of the hair seldom needs to secure strength, the quantity of glue uses as little as posible and pile them so that it may not overflow to appearance. - Since the root of horns "A" has few crevices and is visible after glueing of the hair, paint there with the same color as the pattern of the hair before glueing. 2: Join the sideburns (two right and left). Though the quantity of glue makes minimum also, since the fixed position is fairly ambiguous, decide the position beforehand and attach the parts paying attention not to miss holding. |
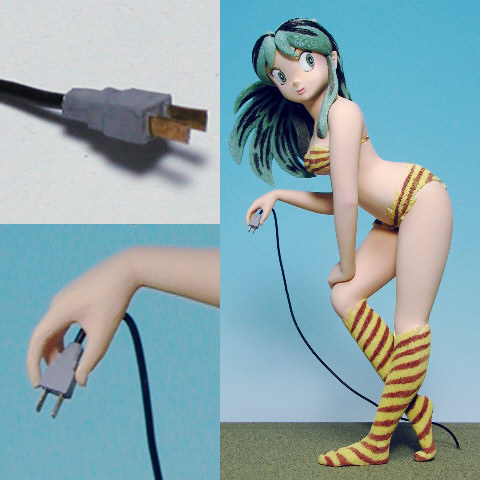
 Assembly of the plug code
 - Though this plug is visible to a normal size in this photograph, the span of electrodes is only 1.5mm. It is the size of grain of rice. Around the root of electrodes, resin has stuck thinly, so delete them with an cutlery. Since the electrodes are made of brass, you had better paint them clear coating for prevent rusting. - Though decision of the plug's color is a worry, It is better that unite with the color of using code or choice safe colors such as gray or black. - When junction of code and plug, just thrusting is enough if condition is good. If it is loose, glue them using the quick-cement. - After fixing of body to the base with the M2 screw, shall hold the plug with the right hand. Once adjust the height of the plug about 5-10mm higher rather than right hand at the free state, and involve it in the right hand. So she has the plug without glue. The code of the plug portion should be about 4mm of curvature radius, so it will easily fit in the hand. |
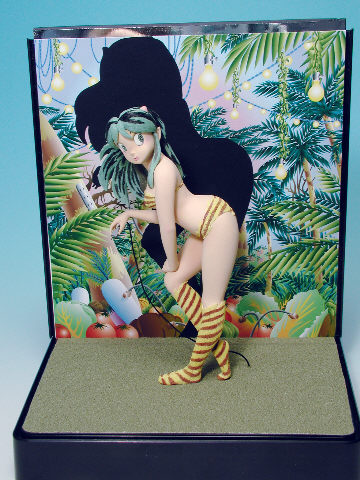
 Making of the base
 - Distortion worries in the photograph because I wonder the angle at the time of shooting was bad. - The back's wallpaper is a work witch was painted on the cut of an original comic by a illustrator Mr. Ohgami (handle name) and I modified it partially. Thanks his kindness for my using. - When it combines with the back, it is not well clear anymore what she has in the right hand, so it is a worry about the color of the plug. - The base is a figure case (T-case DM) made by Wave co., and I used it cutting at the internal height of 160mm. - Though the sheet underfoot is an architect sheet (the surface is sand granular way) made by Hiruma Model Craft. And otherwise, the fiber-like one (made by Tamiya etc.) has also usable, please examine many things. That's all of the "Electric Jungle" garage kit building lecture. |
|
|
Back to The before process
Return to the Figures Making Data Mansion